Need Help?

Facing hurdles in design or sketching? As a student, do you grapple with balancing schoolwork and creative pursuits? This blog provides in-depth, tailored advice, directly tackling issues in design, sketching, and academic management. It's a place where you may find the necessary support and guidance to overcome these challenges. (Copyright © 2007-2024 Daniel Lim) Feel free to share the topics you're eager to explore in this blog. Additionally, if my content has inspired or aided you, I'd love to hear about it. Your feedback is invaluable.

18 October 2011

It is the end of the year 2011... what is next for 2012?

Dear readers, it is the end of the school term already. In this blog, I have tried to post in real-time the design processes, classroom demonstrations and instructions of two levels of my classes for the year 2011.

Secondary 1 N(A) Coaster + Key-Tag project.
Students will find detailed instructions and explanations from the beginning to the end of their project. A good review of what has gone on in class. Usually posts are updated in the same day.

Students learned:
  • How to write a design situation focusing on a real need followed by a list of considerations, limitations and specifications.
  • How to generate ideas using random line works for the coaster project and shape borrowing for the dollar key-tag project. For both projects, students also learned to develop (refine) their ideas for that they looked proportional and aesthetically pleasing as a whole.
  • How to draw basic geometric and organic shapes using a 'random circle and lines technique' + converting 2-dimensional drawings to 3-dimensional drawing using the oblique drawing technique.
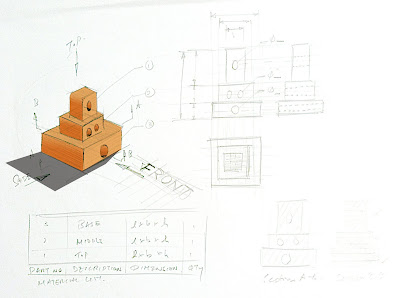
  • How to create a basic working drawing that makes up of a material list, an oblique drawing and a very simplified orthographic projection + dimensions.
  • How to mark out on acrylic and shape the product using tools to work acrylic.
  • How to realise and finish the product.

Secondary 3N(A) & 4N(A) Project: Innovative Storage & Storage Respectively.
Students will find writings, explanations, rationales, step-by-step processes, etc. on the major design process elements, i.e. topics on finding situations and needs, research techniques, idea generation and development skills, and even lots of tips on realization (making). Guides and instructions and demonstrations are uploaded almost right after class, Or at least within one or two days.

Facebook Engagement
The Facebook mrdanielsos@yahoo.com.sg was created for students to be able to reach me in real-time. Anytime. Anywhere. To ask questions, to clarify understandings, or even for any sort of requests related to Design & Technology. Through Facebook was also a good variety of posts on good and innovative products and videos on improving drawing skills and ideas communications.

I think there could also be students who are not in my class, and some even from other schools or countries who may have chanced upon this blog or your friends might have told you about this blog. I hope you have found the information useful and beneficial to you. And if you did benefit from my posts, please do leave me a note to tell me about that. And perhaps suggest what you would like to see more or less of.

What is next for 2012?
Once 2012 starts, it will be a start of a brand new cycle. I will not repeating my post by writing them again. Rather I will be revisiting relevant posts and update its contents along the way as I facilitate new classes in a brand new season. Contents will be reviewed and improved for better readability. Till then... have a great holiday.

Dollar Key Tag Project - Part 5 - Finishing- - En Route to Cutting the Coin Slot

Introducing 'Crabby'. 1N1 (almost completed) demo dollar keytag.

Introducing 'Froggy'. 1N2 (almost completed) demo dollar keytag.

Introducing a short Crabby & Froggy story.

'Once upon a time, there was a frog who was jealous of a crab who has many keys. One day while Crabby was sleeping, Froggy went up and snatched two of Crabby's keys. Awoken by the familiar sounds of his keys, Crabby jumped up immediately and gave a good chase. You can finish the story on your own. The end.'

The dollar key-tag is not finished yet. Because term 4 was so ridiculously short + lots of holidays for this year... students were only able to shape their keychain and bind the three layers together. Nevertheless, it still ends up a neat keychain.

Students would have learned that they could layer up acrylic on top of another to create a thicker piece of acrylic. Students also learn about the concept of color combinations since they have to put three layers together and the color should look right on their product. On top of that, students would have learned the following basic making skills: marking out, shaping using the scroll saw, filing using the various types of files, finishing the product using the wet-and-dry paper and polishing the edges with the buffing machine.

I'll be putting up some best design journals from students... so stay tuned...

19 September 2011

Dollar Key Tag Project - Part 4 - Realisation - Preparation & Marking Out


Transfer the concept on paper on the work piece using the Grid Method.
Above demonstration is done in class 1N1. Below is for 1N2.
Stick all three acrylic workpiece together using double-sided tapes.
Make sure double-sided tapes are directly below the project, not at the 'waste' parts.


(Note: The masking tape you see above is unnecessary. It was there because I pulled off extra two sections of tapes while distributing to all of you earlier on).


Below are 3 basic steps to guide you from Marking Out to Shaping the project.


15 September 2011

Dollar Key Tag Project - Part 3 - Refinement (Development)

Dollar Key-Tag Refinement (Development) 


The example below is taken from my demonstration in class 1N1
Note 1: Here is a summary of some factors that should be considered when you refine your concept.

Before you could refine a concept, you should first select one out of the many you are drawn in the Idea Generation stage. Hopefully as you generate ideas in the earlier stage, you would have been modifying, combining, morphing and improving the concepts along the way. 
Note 2: It is good to keep your focus and refine (develop) your concept on factor at a time. You should also remember to refer to your Design Specifications where you list out the specifics what they product must do. The above example shows you a demonstration on working on weak areas, sharp edges or corners, and finding the best position for the coin. Keep on drawing fresh new ideas as you work along the first two factors. You will find your concept evolving.
Note 3: The next few focus refinement points are improving the overall shape and proportions, followed by exploring the best position for the key ring. Try different shapes and size configurations until they look right. Your first concept may look right in the beginning. But it is still good if you would have a go at exploring some minor variations. The outcome may surprise you! I changed the sizes and positions of the eyes. And it ended up one big and small eyes do look better than both equal size. That also helped me make a major decision that one of the claws would hold a coin and the other the keyring. 


Finally, nothing beats being able to simplify the concept. Find any features (e.g. shapes or method of construction) that looked complicated. Look out for the potential to simplify the project so that it still looks more desirable, easier to manage and make, and takes lesser time.  
Note 4: Always remember to go back to your Design Specifications. I have a restriction on material size. So remember to draw your latest development back into the actual working size to gauge how it might actually look like. Alternatively you may want to cut out a paper model for evaluation. Make any necessary fine-tuning after that. Both on the model and in your design journal. Notice I have also reduced the body size. It is now slimmer than before. I'll continue to develop (refine) it as long a time allows me to do so before I see you all again for the next lesson.
------------------------------------------------------------------------------------------------------------

The examples below are demonstrations in class 1N2
The steps and descriptions would be similar to the ones above.


Refinements on weak points, rounding off potential sharp edges and looking out for the best coin position.
Refinement on the overall shape and proportions and the position of the key ring. Simplifying the profile of the concept if possible but without compromising the functionality and aesthetics desirability.
Finally, the refined concept is drawn to scale within the perimeters of the actual work piece. Here further refinement may be required to ensure that everything is in place. Make sure the coin can move freely in and out of its entry point.

The Grid Method is used to transfer the scaled concept on the acrylic work piece later.

Dollar Key Tag Project - Part 2 - Idea Generation using the Shape Borrowing Technique

Idea Generation 
~
Shape Borrowing from Fish and Animals


1N1 Class Demonstration for Idea Generation

Note 1:  Use your researched images to copy ('borrow') shapes that you think may be suitable as key tags with a dollar coin. At this initial generation stage, draw (or 'borrow') as many shapes as possible and do not worry too much about whether they will be practical or nice, etc. Try drawing in a coin or two just to have a feel of how it might look like with a coin in. 
Note 2: You may be refining certain features as you draw. This is fine. Do not worry and think that you shouldn't be refining ideas at the Idea Generation stage. It is perfectly alright as long as you are clear that your objective now is to generate as many different interesting concepts as possible.

The example shown here is a fish concept. Yours may take the form or other fish or animals.


Note 3: It is important even at this early stage to have an idea how the coins should be held in place. It is drawn here to show you how it will look like because the way the coin should be kept is already decided for you. Otherwise you would have to work it out at within your Ideation stage. Take note that the coin will be 'sandwiched' between the top and bottom shape.
 1N2 Class Demonstration for Idea Generation
Descriptions is the same as above.

How to Research for Images with Line Drawings

People who research for images frequently end up with poor quality prints with blurry edges and details. For those who desire to 'Shape Borrow' often find themselves with photos or images too complicated and defined to borrow its shape without the unnecessary details to the paper. With the following steps, I am going to show you how you can eliminate the two problems easily.


Step 1: 
Go to use 'Google' search. Click 'Image'


Step 2:
Key in keywords like 'fish' or 'animals'. Or more specific keywords like 'Rabbit head', etc. Your choice of keywords is important because that will mean whether or not what you are looking for will appear in the first few pages on the web browser.


Step 3:
You will realize that most images are not very useful for borrowing shapes. Because most for images are either a photo of a fish/animal or in more complicated cartoon forms.
Look the the left hand side of your web browser and find 'Line Drawing. Click on that.


Step 4:
When your web browser refreshes after you click on the filter, you will find that most, if not all of the images will be in the form of line drawings. This is where you start to look for the images that you like. Images that will most likely be suitable to be used as a key-tag to be able to hold a dollar coin.


Step 5:
Copy the selected images. Do not copy the thumbnail image! They are too tiny for print. Click on the image for it to load. 'Copy' when the image is at its maximum size. Paste those images either in a Powerpoint Slide or in a Word Document. Maximize your page space by packing them tightly within two pages.


Step 6:
Print and bring it back to the next lesson. Greyscale or Black and white printing is fine.


Note: Try to copy images that are higher in resolution. So that when you print, they do not become pixelated. Look out for images that are at least 400x400 in size. If you really want to make sure your image size is good, click on the filter 'medium'. Now all images will be at least a medium sized image. Go try. Always acknowledge your sources. If unsure, email the creator for permission to copy.


Have Fun!

25 August 2011

How to Draw a 3D Bottom Half Sphere

Steps to draw a 3D bottom half sphere.


I'll be writing about the steps soon when I find the time. Meanwhile make do with just sketches. They should be pretty self explanatory.

19 August 2011

2D to 3D Drawing - Oblique Drawing


The image above is an example drawn in 1N1. The one just below is demonstrated for 1N2.

There are various forms of 3D drawings. In the order from the least realistic to the most realistic 3D drawing: Oblique Drawing, Isometric Drawing, One-Point Perspectives, Two-Point Perspectives, and finally Three-Point Perspectives. The last one (Three-Point Perspective) is commonly used in Interior and Architecture illustrations and sometimes in Comic Drawings to product very 'dynamic' perspectives.

The examples above shows how an Oblique Drawing is done.

Step 1:
Draw the object's side or front or side view in 2D. Draw exactly how you want it to look like. Observe the chair example.

Step 2:

Select your view point, i.e. from the left or the right.

Step 3:

Project 45 degree lines from the 'corners' in the direction where their respective surfaces is visible to the eye.

Step 4:
You should already know the length of the third dimension. Mark it at the end of each 45 degrees projection lines.

Step 5:
Complete the drawing by joining the end points of each of the 45 degrees projection lines.

Step (Extra):
Make use of the crating method and guidelines to complete more complicated drawings. Refer to the examples with a 'cut' corner, the triangular object and the drawing of a pyramid.

Note: Parallel lines. Many students are not aware that their line works were not parallel to each other whenever they should be parallel. Thus usually ending up with some weird distorted looking objects.

Be careful. When you draw the third dimension to scale, remember to apply the foreshortening technique, i.e. divide the value by 1/2. Otherwise your object will end up looking elongated and you wonder why. =)

Your Homework:Refer to your Design Journal and flip back to your coaster design ideation section. You have at least three to four full pages of organic looking 2D coaster designs. Copy the shapes and convert them into 3D Oblique drawings.

Practice drawing 3D Oblique drawings using your 2D coaster ideas. Fill up at least two full pages of drawing in your design journal.

(A few examples can be found in the image above).

Have fun...

Dollar Key Tag Project - Part 1 - Design Situation to Research


The Dollar Key Tag Project Schedule


Schedule for Design Situation writing to Research for Idea Generation

You are to write your own Design Situation based on the (given) Design Brief.

Your design situation should include a description of your observation and your own grocery shopping experience and the use of the shopping cart.

You can:
1) Go to a supermarket and observe how people respond or react when they retrieve the shopping cart, and or
2) Recall your own experience when you need a shopping cart for your shopping in the supermarket.


The example above shows one way you can prepare to write your design situation. In the form of a mind-map you can start noting the issues with retrieving the shopping cart and the experience of having or not having a dollar coin.

Notice I sketched a scene of two persons at the shopping cart holding area and their conversation about having a dollar coin for the cart. A simple sketch like this to illustrate the situation (or context) can be extremely helpful in explaning what is actually going on and makes it so easy to understand. Sketches of a sequence of events may be helpful too.

Alternatively you may wish to take photos of the situation. Note: In a public place, always ask for permission from the store before you take any photos. If you are taking people, it is also polite to seek their permission to do so. Otherwise take photos yourself and your friends in the situation.

Above is an example done in 1N1

Below is an example done in 1N2
Design Considerations and Design Specifications

Note: When you prepare to list your design considerations and limitations, always remember to list areas that is consistent with your design situation and design brief.

28 July 2011

D&T Offocial Coursework Submission

For coursework Journal and Presentation Board
pre-submission consultation

Check List:
  1. Come with your Journal and Presentation Boards updated.
  2. Come with questons.
  3. Come after you have taken the initiatives to complete your coursework to the best of your ability using the rubrics as your guide.

Coursework Submission ...
Make sure your coursework is Level IV standard before you turn them in.
All the best.
mrdaniellim

27 July 2011

Research and Idea Generation


The role of research in the Design Journal is probably one the most misunderstood and the least complete. The same goes to the Idea Generation and Development stage.

As a rule of thumb, all researches must be meaningful and purposeful. And the research must enable you to make some decisions to move on with your project. So you must know WHY you research and WHAT do you want to get out of those researches. And after the research, WHERE will the information lead you to do? WHAT new solution, idea or concept is a result of that research?

With that in mind, a good set of ideas generation cannot be completed without good research. There must be something that inspired you - a particular image, shape or form or functionality - or something you need to find out or clarify, etc. Where and what you did your research is where you would place the image or any references beside your proposed ideas.

The Idea Generation rule of thumb is the flow of ideas, evolving and morphing and refining from one to another - Improvements and modifications 'along' the way that works towards a better solution.

Development: When you find yourself starting to work out and confirming dimensions, deciding on materials, colors and fixing methods, etc. you know you have arrived at the Developnment stage.

Note: It is difficult to draw a line and distinguish where is Idea Generation and where is Development. But you will know when you arrive at Development.

25 July 2011

Grid Method - Transferring Refined Coaster Patterns onto an Acrylic Workpiece.


Using the Grid Method to Transfer Refined Concept on Acrylic Workpiece

How to use the Grid Method:

1) Draw grids on your original pattern. Add in grid numbers (see the image below) if that makes it easier for you. For more complicated patterns a 5X5 grid may be needed. The above example has a 4 X 4 grid drawn.
2) On your acrylic workpiece, draw the same number of grids on one side.
3) Locate the intersection of your drawn lines with the grid lines with 'X'.
4) Note the location and distances of the 'X' on the grid line and proceed to mark an 'X' on your workpiece.
5) Finally, join the lines or curves up. The pattern on your workpiece should look more or less identical to the one you have drawn on paper. If not, somewhere might have gone wrong. It happens. =)

Note: The smaller your grids, the more accurate your transfer can be. But slightly more work.

This is also an example of transferring the coaster pattern using the Grid method. Notice there are measurements everywhere. These measurements are distances from the centre of the circles to the perpendicular edges of the working material.

These measurements are useful for two reasons:
1) They are used to locate the centre of the circles which you can use a compass to draw a circle later on, or
2) for you to mark an 'X' where you need to drill or bore a hole.

22 July 2011

Simple Refinement (Development and Improvement) Process for Coaster Design

This section is a continuation of a lower secondary Cup Coaster Design project.


Refinement (Development and Improvement) Process for Selected Coaster Pattern Part 1 of 2
Steps:
1) Round off sharp external and internal corners
2) Widen narrow 'necks' to improve strength
3) Simplify shapes to make them more manageable for making.

Refinement (Development and Improvement) Process for Selected Coaster Pattern Part 2 of 2

Steps:
1) Refine overall shape to achieve good proportions
2) Continue to morph design to achieve desired aesthetical expectations.

Remember: The refinement (or development) process is finish, only when the designer thinks it is finished. To produce quality work, the refinement process towards a final solution must also take into consideration satisfying the user's needs and expectations, the place the product will be use, the practicality of the final shape and form, etc.

Did you notice the fridge at the bottom right hand corner of this example? As I was refining my coaster idea, I thought it would be nice to have a magnet right in the middle of the coaster pattern so that I can store it on a fridge if I do not need it anymore.

It would not be enough if I were to just draw a magnet on the coaster say 'Oh see, there is where the magnet would be... " and treat that as an improvement. It would make better sense if I sketch the new idea on the side of a fridge! Since it is now placed on the fridge, I can go on to evaluate the idea of a coaster on the fridge meaningfully. And that represents clearly what the magnet on the coaster is intended for. That is putting the newly proposed idea back in perspective to enable meaningful evaluation on its functionality and practicality.

This process of 'Putting Concepts Back into Perspective' within the intermediate key stages of ideation and development is so important but often neglected by students.

Next: Grid Method - Transferring Refined Coaster Patterns onto an Acrylic Workpiece.

21 July 2011

Presentation Drawing in Drawn in sub-Context - With Human Figure Interaction


Difficulty drawing human figures? Fret not. There is always the internet with lots of resources.

But do remember copyright issues. So do not simple copy and use images without permission from the owners. Alternatively, use images from Yahoo image search with filters to locate Creative Commons images. Those images are free for copying and use.

An alternative would be to use an image as a reference, and then draw it out on your own. Making modifications and eliminating unnecessary details. I find using internet images as a reference to draw objects, figures or even hands very useful since I admit I am not good at drawing figures or hands interacting with objects.

Many students failed to draw decently. I can confidently say almost none draw with a reference.

Now I'll explain why I call the above 'sub-Context'. The full contextual illustration shows the user, using the product in its intended environment. The example above did not show the intended environment.

Figure Drawings for Presentation Drawings


The 'N' or 'O' Level presentation board 'Presentation Drawing' component requires the student to show their Prototype used in Context. In other words, 'Contextual Drawing'.

That means the Prototype should be presented with the user, using the product in the proposed environment. It is best to present such that it is clear how the product is intended to be used and how it works.

But most students will find drawing human figures or hands to interact with the product the most difficult. So it is necessary for the student to practice drawing simple figures and hands as early as possible.

18 July 2011

Presentation Board | Presentation Drawing | Working Drawing Overall (Planning) Starter Kit (2011)

(Almost) Everything required within your Presentation Boards.

Note the different types of drawing techniques employed to communicate your ideas when you present them in your presentation boards. Note also the timing shown in the image above is for illustration purposes only.

Presentation Board Layout Planning (I) - Drafting

Presentation Board Layout Planning (II) - more details shown

Tips:
It is always good to list out what you wish to include in your
1) Presentation Drawing
2) Working Drawing

The expectation for Presentation Drawing is
a) Competent graphic presentation,
b) with all detail showing contextual use of design solution

The expectation for Working Drawing is
a) Detailed working drawing
b) with material list.
c) Drawing standards must be adhered.

Working Drawing Starter Kit - Isometric Drawing and Exploded View

Isometric Drawing

To be used for Part Labeling


Exploded View

To illustrate how parts come together. Also known as assembly drawing for use as a guide during assembly.

Material Surface Illustration Starter Kit


Drawing your product used in context is not just about drawing proportionately, to scale and rendering.

The ability to Illustrate the correct material representing surfaces of wood or acrylic is equally important. Within this example, there is also some tips on how to illustrate a 3D organic surface using isolines (or contour lines).

Working Drawing Starter Kit

Sample (Draft) Working Drawing Layout.

Plan before hand where you want to place your information on your A2 Presentation Board. You may use an A4 or A3 paper to draft out where you want the necessary drawings to be. Use that draft to create your actual Working Drawing.

Sample - Orthographic Projection and dimensioning

An orthographic projection is drawn to scale. Remember to adhere to standard rules for type of line works, placement of arrows, leader lines, dimensioning circles and radius and inputting numbers, etc.

09 June 2011

General Processes - Spray Painting on Wood Surface

General Processes

Pre-Check
  • Check if your workpiece is best painted before or after jointing. If you get that wrong, the process of spray painting for the subsequent layers will become a nightmare.
  • Ensure that the surfaces for spray painting is well finished (sanding), dry and and cleaned of wood dust.
  • Note surfaces or edges that will be covered or out of sight, you need not spray paint those areas.
  • If you have to drill holes or cut a rebate joint somewhere in your workpiece, get it done before spray painting.
Step 1: Part 1 of 2 Preparation for Location and Supports
  • Locate a well-ventilated designated area suitable for spray painting.
  • Prepare a few waste blocks of wood to support and elevate your project. A turntable will be perfect.
  • The turntable or the blocks of wood will also enable you to turn your project around during spray painting without touching your project.
Step 2: Part 2 of 2 Preparation for Spray Can

  • Shake the can for two full minutes once you hear the mixing ball begin to rattle.
  • Before you start spaying on your workpiece, it is a good practice to spray first on a piece of scrap material. to make sure the paint is coming out in the way it is meant to.
Step 3: Spray Painting

  • Maintaing a distance of about 300mm from the spray nozzle to the project.
  • Select a starting point on one end and spraying across your project in one sweeping motion.
  • Do not hold down the spray button continuously, when you are at the end of the first pass release the spray button.
  • Always be mindful and maintain a constant distance from the item being painted.
  • Overlap each pass by about a third to keep paint finish even and consistent.
  • Continue in this fashion until entire project has one coat of paint.
  • Allow paint to dry for the recommended amount of time before adding a second coat.
Repeat Step 3 if necessary.

Tips:
Apply each coat of paint in thin coats to avoid runs or drips.

Note:
Unlike lacquring on on wood, there is usually no need to sand the surface before applying the next coat.

08 June 2011

General Processes - Jointing Multiple Layers with Multiple Dowels


Example using a Typical Photo Frame Project:
You want to join a piece of clear acrylic to a wood with 4 dowels to make a photo frame. So that the clear acrylic cover can be removed to add or change photos. You want to place one dowel in each corner. How do you install the dowels and make sure all the holes are aligned?
Note: This section assumes that the student is able to prepare and get ready the wood and acrylic material for the next stage. It also assumes that the student is able to mark out both wood and acrylic proficiently.
Step 1: (Marking Out)
  • Use double-sided tape to tape the acrylic sheet to the wood.
  • Avoid taping where the holes will be drilled.
  • Mark out the positions for each of the 4 holes with an 'x'.
Step 2: (Preparation to drill)
  • By now you should have worked out the length of each dowels based on the thickness of your wood and acrylic.
  • If the diameter of each of your dowels is 6mm, the get ready a 6mm diameter drill bit.
  • Install the drill bit to the drilling machine.
  • Get ready 4 dowels that is already cut to length.
How to get the length of each dowels?
  • 2/3 the thickness of the wood + thickness of acrylic sheet + how much you want the dowel to protrude out of the acrylic sheet.
Tips:
  • If you are unsure if your dowels will be tight fit on your photo frame, test using waste acrylic and wood. (see step 1 for preparation)
Step 3: (Drilling Procedure)
  • Secure your combined work piece (see step 1) on the drilling machine with an F-Clamp.
  • Set the drill bit to the required depth.
  • (To drill a through hole, see 'tips' just below this step)
  • Drill the first hole and install a dowel.
  • Drill the second hole diagonal to the first hole and install a second dowel.
  • Repeat the process until all holes are drilled.
To appreciate why you need to do the above, mark out and try drilling four holes individually on an acrylic sheet and wood one after the other. Put them together and try putting in the second dowel. How's that?
Tips:
  • If you plan to drill through the holes, i.e. you want to expose the dowels on the other end of your photo frame, you need to place a piece of waste wood below your workpiece. Drill through your workpiece into the waste wood.
  • This is to minimize splitting (on the wood part) at the other end of the drilled hole.
To appreciate why you need to do the above, try clamp a waste wood suspended on a machine vice without a waste wood below. Drill through. You will know what I mean.
Step 4: (Finishing)
  • Split both the clear acrylic cover and the wood for finishing separately.
  • Finish both the clear acrylic cover and the wood respectively with your desired finish.
The end.

General Processes - Working with Acrylic

General Processes:

Pre-Check
Make sure all parts given to you are 'square'. That means the edges are 90 degress to each other before you start marking out.

Marking Out (After you got your freshly cut acrylic sheets)

1) Mark out all parts with lines for sawing, or trimming, or bending with a pencil and mark the centres of curves (radius) and holes to be drilled with an 'x'. Mark out all the positions for screws and/nails nails.

Tips:
  • Do not tear the protective paper away from the acrylic yet. The paper surface is for you to draw and mark out.
  • If you plan to have screws to join acrylic to wood, work out the correct length, type of head, and the diamter & depth of the pilot holes to drill on the acrylic. Generally if you want the surface to be 'flushed', use a Countersunk Head Screw. If you do not mind the screw head popping out of the surface, use a Round Head Screw.
  • Make sure that you do not screw too close to the edge of the acylic. At least 10 - 15 mm away from the edge is a good guide. But that will depend on your application.
  • For bending, the marking-out lines should be 'dashed-lines'.
  • For circles or radiuses, the marking-out lines should be 'centre-lines' cutting through the centre (or 'x').

Drilling
2) Drill all the holes first.

Tips:
  • If dowels are required, make sure you check that the diameter of the dowels matches the diameter of the drill bit. To check if the fit nicely, try it on a piece of waste acrylic.
  • If you require a flat hole, use a Forstner Bit instead of a Drill Bit.
  • If you require a large hole and not even the Forstner Bit can create it, consider using a Hole Saw instead.
Sawing & Trimming
3) Saw / Trim curves using the Scroll Saw (concave or convex curves) or a Hacksaw (for long straight cuts). For external curves, the Circular Sanding Machine may be used.

Edge Finishing (Part 1 of 3: Filing)
4) File the edges with the correct files. (see 'Important' just below).

Tips:
  • Holes cut out with a drill bit or a hole saw need not be filed extensively. The curved surface are already perfect as it is. If need to, file lightly to get rid of the burrs, or use a Wet & Dry paper instead.
  • Always use the right file for your work. Generally a Half-Round file for curve edges, and a Flat File for straight edges and for rounding off corners.
  • The objective of filing is to take away large scratches from the edges from saw cuts. So make sure at the end of your filing, inspect the edges for remaining deep scratches.
  • Round the edges for aesthetics. It usually works.
Dry Assembly (to test if parts fit)
5) Dry fit all your parts, check that they are OK. If not ok, modify or re-do. Tips: Don't join them with Chlorofoam yet!

Tips:
  • Important!: If bending is required, make sure you complete your finishing process first.
Edge Finishing (Part 2 of 3: Wet & Dry Paper)
6) Prepare acrylic edges for polishing using the Wet & Dry Paper.

  • IMPORTANT: If you are joining edges, you MUST NOT sand the edges to be joined! It will not fit after that.
Edge Finishing (Part 3 of 3: Polishing with the Buffing Machine)
7) Finish the edges of the acrylic on a Buffing Machine till shine.

Jointing (also see 'Bending & Forming')
8) Acrylic to Acrylic: Butt-join acrylic parts using Chlorofoam. Use tapes to sequre the parts if necessary.

Note:
  • Make sure the edges for jointing is straight, not filed, and not polished.
Others:
  • Acrylic to Wood: Jointing using Wood Screws, or Bolts and Nuts, etc.
  • Acrylic to Metal: Machine screws or Rivets, or Bolts and Nuts, etc.

Bending & Forming (also see 'Jointing')
9) Bending acrylic on the Strip Heater: For straight bends.


Tips:
  • Plan the steps before hand how you want to bend your acrylic.
  • Use a piece of paper to rehearse if you are unsure.
  • Use formers (of various bending angles) to help you achieve accurate angles while bending.
  • If there is no formers available, design and make them before bending.
10) Forming acrylic can be done using the Oven, the Vacuum Former, or the Blow Moulding machine.


Tips:
  • Plan the steps before hand how you want to form your acrylic.
  • Use formers to help you achieve accurate shapes and forms while bending.
  • If there is no formers available, design and make them before bending.
What if your project has both Jointing and Bending and/or Forming?
  • You have to plan the sequence well on which to complete first before the other.
Additional Notes
  • You will notice that finishing your acrylic edges is put before jointing, bending or forming.
  • The reason is because once you join, bend or form, it is more difficult to file and polish.
  • If in doubt... alway ask.

Mastering Unfamiliar Themes: A Simple Guide to Kickstart Your Design & Technology Coursework

Embarking on a  Design & Technology (D&T) project can be an exciting journey but students often find themselves at a crossroads when...