Need Help?

Struggling with design work, sketching, or managing academic pressure? Whether you're a student balancing deadlines with creativity or an educator seeking clarity in your teaching approach, this blog offers focused, practical support in Design & Technology — from visual communication to process thinking and digital fabrication. Since 2007, Design Journal SOS has helped readers overcome real classroom challenges with grounded strategies and insight. 💬 Have a topic you're curious about? Or found something here that helped you? I welcome your questions and reflections — they keep this space alive and evolving. 🔗 Follow for updates: Facebook /designjournalsos (Copyright © 2007–2025 Daniel Lim)
Showing posts with label Dining Accessories Project. Show all posts

09 May 2013

Dining Accessories Project 2013 by my 2E3 and 2E4 students (Semester 1)

 2E3

2E4

My students of 2E3 and 2E4 have been with me for the past 14 weeks or so working on their individual Dining Accessories Project and this is the result of their time with me. All of them are designed and made by the students under my guidance and facilitation. Great students this year with lots of interesting solutions. We have a range of toothpick to napkin holders, chopsticks to cutlery holders, feedback forms and menu holders and from customer tips to tea light holders. The theme given to the students is 'Innovative Premium Dining Storages' for high class restaurants.

I hope they had a great time with me as I do have a wonderful time with them. Next semester I will see the next half of the class. Let's see what they could come out with.

11 March 2013

Fish Note Holder - Design Refinement and Development Demonstrations

The two links are demonstrations on a 'Fish Note Holder' featuring the following topics: 
  • Design Refinements and Developments 
  • Working Drawing (based on ratios rather than on dimensions) 
  • (Simple) Presentation Drawing 
  • A Pictorial Presentation of the Making Process. 

Design Refinement and Development + Working Drawing + Presentation Drawing

Making Process (Realization)

16 January 2013

Secondary 2: Dining Storage Accessories Project - Design Considerations & Limitations + Design Specifications

This part of the design process is right after you have written your Design Situation and Design Brief

Design Considerations and Limitations


The 'Design Considerations and Limitations' (or Constraints) can be liken as 'what factors should I consider'. Thinking of it in this way will make completing this task slightly easier.

Limitations or Constraints refers to factors that will 'restrict' you in making the product. Some factors that are considered 'limitations' or 'constrains' or 'restrictions' are for example, time, cost, sizetechnological feasibility (i.e. the available type of machines and tools in the school design workshop), so on and so forth.

...................................................................................
Imagine you need to plan for a class outing. You will need to plan and create a list of stuffs you need to do (or consider bringing). You do not need to go into the details yet but generating an initial list from which you can work out in details later. For example, you'll need to consider to 'bring some bottled drinks', then 'plan the routes to the destination', etc. 

In a similar way, you would have already chosen a particular type of 'storage' or 'holder' you want to design for. Recall your Design Brief. Now think, "I want to design and make a ..." so "what are the things/factors I must 'consider'?"
...................................................................................

Examples of common factors related to a proposed project

'I must consider..."

'functionality': what you want your product to do or how you want your product to work)

'size': this could be the area of the space you want your product to be placed, or the overall size of the product you will eventually make.

'materials': this can refer to the type of materials that you are given or the quantity.

'time': in a project you are usually given a period of time to complete your work. so considering the time you have is important as it will influence the way you spend your time and design your product. so that you can complete it in time.

etc. You can read more about the other factors by referring to your textbook. 

...................................................................................
Critical Dimensions:

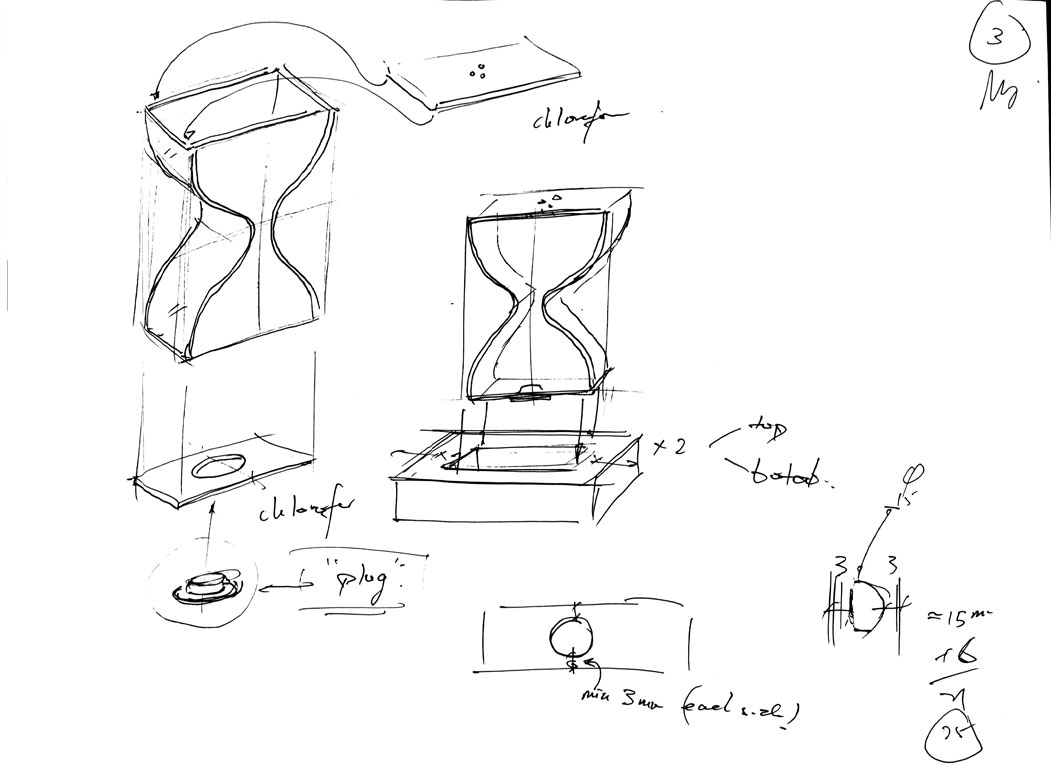
The critical dimension is part of research and it is an important one to consider. For example, I want to design and make a 'business card' holder. Before I begin generating ideas and such, I got to have some important data on standby for me to make some design decisions later. 

One common dimension that you must have is the dimensions of the 'things' you plan to hold or store. If I plan to make a holder / storage for business cards, I should research on the sizes of a typical business cards. I might go as far as measuring the thickness of a single card, or multiples of 5 cards all the way to 20 cards, or so. The more variety of ways to measure and better. Because I do not know if I will need them. Who know?

If yours is a straw holder, then measure the straws. A single one and a bunch of them. If yours is a spoon and fork holder, then measure them too. For the rest it is the same. Measure them. Weigh them. Whatever data you can record.
...................................................................................

Design Specifications


I like to think of Design Specifications as a 'wish list'. 

It sounds more 'friendly' and less daunting than 'Design Specifications'. So technical.

The design specifications are a list of very specific instructions that comes from your list of design considerations. Can you still remember design considerations as a 'list' of factors which you need to 'consider'? They were not detailed at all. Or not detailed 'yet'. 

When I say 'I need to consider the quantity of cards for the business card holder', I have not specified 'how many'. In design specifications is where you state 'how many'. In design specifications you will also state how 'big / small' (e.g. area or volume), how 'cheap / expensive'(e.g. cost), how 'long / short' (e.g. time or length), how 'heavy / light' (e.g. weight), etc.

In the example above, I will be very specific to say, 

'The product must hold (at least) 15 business cards'. 

Nothing more than 15. The number 15 is a very specific number.

You can also put numbers on factors that is concerning efficiency, or fast or quickly or ease o use. You use 'time' to quantify efficiency. You can say,

 'The product must be easy to use. The user must not take more than 5 seconds to refill all the 15 business cards into the holder when it is empty'.

Shown above are two examples on how you can complete your Design Specifications

Refer to your textbook if you still have problems completing this section.


11 January 2013

Secondary 2: Dining Storage Accessories Project - Research Part 2/2: Focused Product Storage

 Focused Research and an example.

This shall be your second set of research, Focused Research, after you have done your General Research activity and had written your Design Need and Design Brief.

The objective of the general research on various types of holders/storages is an activity to help you practice and learn to pick out innovative products. And also to be used to navigating through the DesignJournalSOS blog and all the cool websites. When you identify and read about the products and then form your own comments to be written beside each product, that will help you appreciate even more on the uniqueness and the type innovation associated with the product. What you produce for the activity in your journal will also help me understand your ability to do so.

FOCUSED RESEARCH
Let's get started on Focused Research. Well, as the name implies, this research is 'focused'. By now you would have selected what you wish to design and make. For me? I've decided on a 'business card storage'.

So for this research activity, you'll focus on seaching for innovative, cool, funky, quirky, etc. business card holders/storages. From where do you find examples of innovative storages? Refer to my list of 'Design References'. The process and the procedures are similar as the General Research activity.

Fill up to 3 or so pages of your selected type of holders/storages.

Bring your work on the date I set for your hand-in.
Look out for announcements in your class FaceBook page for updates.

Secondary 2: Dining Storage Accessories Project - Research + Design Need and Design Brief

Today's activity will mark the start of your design journey! Isn't that exciting?
Introduction
You will be given a set of Design Need. Also commonly known as Design Situation or Design Opportunities. Basically the Design Need/Situation/Opportunities all do one thing, and that is a short paragraph or two stating the current situation and the problem or a design challenge that is identified.
But you got to write your own Design Brief that follows right after.
-------------------------------------------------------------------------------------------------
To begin, let's take a look at the classroom demo below and a review of the steps we did in class:
Part 1/2

Steps:
  1. You were tasked to work in groups of 4s.
  2. Braintorm using a Mindmap to identify Restaurants you know or have been to.
  3. Select ONE Restaurant and proceed with another Mindmap to identify holders and storages you may find in the restaurant.
  4. Select ONE type of holder or storage.
You will fill in the Restaurant and the type of Holder/Storage in the next activity where you 'copied' the Design Need and Design Brief.
-------------------------------------------------------------------------------------------------
Part 2/2

Steps:
  1. You have already copied the Design Need. You will just need to fill in the 'blank' in the Design Need: 'The restaurant (fill restaurant name) had decided...'.
  2. Once you have done that, you will write your own Design Brief following the guide given to you, "Design and make a/an (interesting/fun/innovative/cool/etc.) (what?) to do (what?) for (who) to be placed (where?)'.
  3. Note: You do not need to follow the sentence structure rigidly. But try to include all the details.
  4. An example of a Design Brief may look like this, 'Design and make a/an (interesting/fun/innovative/cool/etc.) (business card holder) to do (hold business cards) for (restaurant customers) to be placed (on the cashier counter)'.
Note:
  1. Add in 'fun', 'cool', 'funky' (whatever) will make your Design Brief look real exciting to work with later. It will also give you a sense of direction on what you will be researching on and how you will sketch your ideas to look like.
-------------------------------------------------------------------------------------------------
Next, is Focused Research. Find it here.
-------------------------------------------------------------------------------------------------

09 January 2013

Secondary 2: Dining Storage Accessories Project - Research Part 1/2: General Product Storage


Without prior knowledge of what they are going to design, I got my students to begin their project with a task to research on as many storage examples as possible. This activity is a follow up on the lesson on 'Innovation' and about innovative products / solutions.

What my students could produce will be a good indication on whether they have learned to identify and pick out innovative products from the norm. This is a very important skillset to acquire for the later stages of Ideation & Development. One must first learn to understand and identify an innovative solution. Then the possibility of being able to churn out innovative solutions is possible. Other very essential skills like sketching and the ability to generate many ideas quickly and effortlessly are another set of skills to be covered later.

Here is how you can complete the task:
  1. I have a list of 'Design References' on the right hand side of this blog. Scroll down and you will see a cool list of websites that I have compiled.
  2. Pick one website randomly or start from the first one (or the last),  study those innovative solutions, read what is written about them. Click the link that brings you to its original website (if any). Think about those innovative solutions and what inspired the design. Admire them. Start to get used to seeing and knowing that these products exists.
  3. Select those associate with 'Storages' and use them in your journal as your research.
  4. Remember to include the URL to acknowledge where you get the images from. The URL will also be useful later when you need to trace back to its origin later.
Some other useful tips to do your research:
  1. You need to know what you want to know or find out, before you can set off and do some research. Otherwise you will be a headless cockroach running frantically and heading no where. Be very clear of your objective. Your objective is to find 'as many (innovative) product storage examples as possible'.
  2. You can either search aimlessly, randomly or you can set for yourself a simple structure to do your research.
  3. Each of those methods can yield very different outcomes. Researching randomly may bring you some surprises cause you won't know what is next. But being 'random' will also mean taking a longer time to complete your task. Being 'random'  allows you to get in touch with more general stuffs which you otherwise might not have cross path with. Being 'random'  is very good if you have time and want to study and admire stuffs slowly.
  4. Having a simple structure allows your research tasks to be more focused. An example of a simple structure is to use the method called 'Location Mapping'. 'Location Mapping' simply means 'the map of a location', for example a map of your Home. You begin by identify parts of your home, e.g. the Living Room, the Bedroom, the Study Room, the Kitchen, and Bathroom, etc. You visualise yourself walking through these locations. When you arrive at the 'Living Room', 'look' around and ask yourself 'What do I see that is a storage, needs or have a storage?' Make a list of them. You can then use your list in a systhematic way to find the type of storages. You move on to the next item, and the next location, until you finish your entire house. When you finished you will have various categories of researches related to 'Home' storage solutions.
  5. Even better if you are physically at home and you'll literall walk around with your notebook and start listing stufss down.
  6. If I were you, I will use a mix of both (Random and Simple Structure) to get the best of both wolds in my research.
Fill up to three or four pages in your journals with many research images. We will be using them for Idea Generation.


12 April 2012

Presentation & Working Drawing - A Simple Version

First of all, let me clarify why the title reads '... Simple Version'. In the GCE 'N' and 'O' Level Requirement, students are expected to produce a presentation drawing that is drawn in context. That is to say the product illustrated with user interactions within the proposed environment.

However, for my students in Secondary Two, the requirement for their presentation drawing is much simpler. As long as they can illustrated their design showing clearly the product in use, that is a good job done.

Below are examples which I showed my students in class what the hand-in quality of their presentation drawing and the working drawings should be like.

I did not follow use the students' theme 'Dining Experiences' cause I didn't want them to 'copy' my demonstrations. Rather to learn to design independently and with full autonomy.
A Sample of a Fish Note Holder Presentation Drawing

Nothing special here. Just the proposed product. Holding what it is intended for - business card or notes. Presented on a table. The students are free to add colors to it to enhance their presentation.


A Sample of a Fish Note Holder Working Drawing

Nothing special here again. In fact that is almost a complete working drawing. Shown in the example above are the basic essentials of a working drawing. 1) An Isometric View of the product with all the parts labeled, 2) An Orthographic Projection of the product to show the various dimensions and finally 3) A Material List.

Noticed in the Working Drawing sample I added a base to it. I did this because there are some students with more than one part to their design. So in the demonstration, I hope to cater to their needs by simulating an additional piece.

IMPORTANT:
The material list shown above is not entirely correct. It was deliberate.
Why not you spot what is wrong?

20 March 2012

How Does a Facilitation on Processes for Making Look Like?

I've begun afternoon consultations for my Secondary TWO students.

Below you'll see how I facilitated 2N1 Angeline Salt & Pepper Storage over a time period of 30 minutes or so. Angeline final concept (not shown), was a skinny (side-view) 'hour-glass' shaped holder made of acrylic, and wood at the top and bottom as support. However there were difficulties in working out how to develop the parts to dispense Salt or Pepper, for re-fill and to able to keep all the little parts intact all the time.

Page 1:

My first task was to help Angeline understand different possible ways to construct the 'hour-glass' concept. She already had it worked out from a series of idea generation and refinement rounds to come out with the two flat 'hour-glass' panels cut out from a single acrylic sheet and covered using a formed acrylic strips at both open-ended sides.

At Secondary TWO, I would expect she might have some technical difficulties in actually making it work. So in the example above, I started clarifying how the base of the holder may be constructed from a single piece of Jelutong wood, which in turn depends on the width of the 'hour-glass' design. And put a note for her that we need to consult the Workshop Instructors to see if 'cutting' a rectangular slot in the wood is possible.

We also discussed that the allowance left after 'cutting' from the slot to the edge of the wood cannot be too thin as that would make the stucture weak. We need to work out the width of the 'hour-glass first'.

Page 2:

Forming the curved acrylic strip shape to fit the sides of the 'hour-glass' needs to be planned carefully. Making use of Angeline's original process to construct the 'hour-glass' the process was further refined including other possible ways to construct it. Throughout page 2, the emphasis is on how formers (a male and a female) could be used to create the exact curve she needs for both sides of the 'hour-glass'.

When you see #1, #2, and so on in page 2, those were referring to the steps I drew on paper as I described how each process can be completed to create the formers needed, and at the same time aims to cut-out the 'hour-glass' shaped design - all in a single process.

It is important to make sure that the shape of the former has exactly the same curvature on both ends on the 'hour-glass' shape. That is why the wooden former and the acrylic 'hour-glass' shape is cut together. Both the former wood and acrylic can be secured together using double-sided tape.

Page 3:

Finally we come to the part to talk about Salt or Pepper dispensing and how to go about making that. The simplest soluton is to find some sort of 'plug' which can be found in some medication bottles, e.g. the PiPa Gao bottle (in Chinese 枇杷膏). That can go to the bottom part. The top part is another similar acrylic strip with tiny drilled holes for 'dispensing'.

Measuring the diameter of the 'plug' will lead you to the width of the bottom 'plug' acrylic strip. After explaining the rationales about giving allowances from the drilled hole to the edge of the acrylic, the width of the bottom 'plug' acrylic strip is quickly worked out.

The rest of the dimenions on the hour-glass body is left to Angeline to work out on her own.

Conclusion:

That was one happy successful consultation session. Angeline was able to show her understanding from the discussion and this is possible because she had already been working on the processes of making for some time. A lot of thoughts were evident through her design journal especially at the refinement phase. The details of measurements and how a single acrylic sheet could be subdivided to maximize material usage, etc is impressive for a 13 year old.

My job was to help her refine and shorten the processes by introducing alternative techniques and approaches that she might not have thought of. Sometimes radically changing the processes.

In the end, Angeline still got to make a decision on the final processes.

Those were my drawings all right... but Angeline would need to bring that home, recall our discussions and come out of her own version.

That's quite a challenge. But I believe with Angeline's keen attitude, the Hour-Glass Salt & Pepper Holder will surely turn out just as designed.

28 February 2012

How to Use S.C.A.M.P.E.R. for Idea Generation (Concept Borrowing) and Development

2012 Secondary 2N1 Project:

Dining Accessories

@ the idea generation and development stage

I taught the students the technique I called 'Concept Borrowing' for idea generation. The first step is to start off with lots of innovative concepts for 'borrowing'. The table concept (in red) is one existing innovative product. This table top idea is a colored-paper storage which is designed to double up as a drawing table for children. That is VERY CLEVER! The idea of multi-color and layering table top can be adapted and transformed into an idea for a possible dining table. In this way an idea can be quickly generated and ready to be refined and modified to suit the needs for the current design situation.

NEXT... the S.C.A.M.P.E.R. technique in Action

The SCAMPER Technique in Brief

I taught my students the S.C.A.M.P.E.R. technique to generate ideas with the focus on 'Adapt' to kick-off ideas. Students are required to research on various general type of storages. Different from when they have chosen to design and make.


A Quick Example on using the S.C.A.M.P.E.R. Technique

The example is an example of 'concept borrowing'. What it means is to identify innovative functional concepts of various storage solutions and 'adapt' their functionality to their intended project. By using 'concept borrowing' the student generating ideas can basically turn any existing concepts literally into anything they want. This not only helps a great deal in starting the ideas generating process, it also enables high quality concepts to begin with as initial ideas. These ideas can be accessed, combined, etc, selected and developed at a later stage.


Idea Generation and Development focusing on FUNCTIONALITY

The above example shows an existing (drawn) Key Storage Concept. Notice how exactly the way it holds the key tag is 'copied' and 'adapted' as a note holder? The borrowed concept is then further worked on, improved and modified to make sure the idea works and works well as intended.

Idea Generation and Development focusing on FUNCTIONALITY then AESTHETICS

The example above shows again a summary on generating ideas focusing on Functionality. It is important to think about how to design things that will truly work. At this stage, I will expect to be commuting frequently to the workshop to work on models and prototypes to test my assumptions. To make sure my ideas do work.

At the lower half of the example, you'll notice I've started toying with shapes and forms. Adjusting the solutions proportion and further modifying its overall appearance. It is normal for ideas to keep flowing in as you think and thinker with ideas and improvements. Sketch and note everything down. And have lots of fun doing so.

=) Let me know if you liked this section. =)

A follow up for the  S.C.A.M.P.E.R. Technique, click 'HERE'.