Need Help?

Struggling with design work, sketching, or managing academic pressure? Whether you're a student balancing deadlines with creativity or an educator seeking clarity in your teaching approach, this blog offers focused, practical support in Design & Technology — from visual communication to process thinking and digital fabrication. Since 2007, Design Journal SOS has helped readers overcome real classroom challenges with grounded strategies and insight. 💬 Have a topic you're curious about? Or found something here that helped you? I welcome your questions and reflections — they keep this space alive and evolving. 🔗 Follow for updates: Facebook /designjournalsos (Copyright © 2007–2025 Daniel Lim)
Showing posts with label Ideation Techniques. Show all posts

23 July 2024

Enhancing Ideation in Design and Technology Classes: A Practical Guide for Teachers

Introduction: 

In Design and Technology (D&T) education, guiding students through the ideation process can be challenging. Both teachers and students may face the dilemma of choosing the best approach to help students start their creative journey. While there may not be a definitive way to approach ideation, a simple, logical, and practical guide can significantly enhance the decision-making process and enable students to produce quality work from the start.

The Three-Step Ideation Guide

The three-step ideation guide incorporates Shape Borrowing, Concept Borrowing, and SCAMPER techniques. This structured approach ensures a comprehensive and innovative ideation process, allowing students to systematically generate, enhance, and refine their ideas.


Step 1: Shape Borrowing

Overview: Shape Borrowing is a visually oriented technique where students draw inspiration from existing shapes, forms, and designs. This method provides a tangible starting point, making the brainstorming process less intimidating.

Rationale:

  • Encourages creativity by utilizing existing forms as a foundation.
  • Generates visually appealing initial ideas quickly.
  • Reduces intimidation by providing concrete shapes to work with.

Action Plan:

  • Look at various sources of inspiration (nature, architecture, everyday objects).
  • Sketch at least 5 different designs based on interesting shapes and forms.


Step 2: Concept Borrowing


Overview: Concept Borrowing involves studying various existing products to identify and adapt innovative, clever, or useful features and functionalities. These products can come from a wide range of categories with similar functionalities. The identified elements are then adapted and modified to inspire new ideas and solutions for the current design project.

Rationale:

  • Leverages proven solutions, reducing the risk of functionality issues.
  • Encourages innovative combinations of existing features.
  • Helps generate high-quality initial ideas that can be further refined.

Action Plan:

  • Identify existing products with relevant features or functionalities.
  • Integrate these features into your initial designs. Modify as necessary to fit your design theme and target user needs.

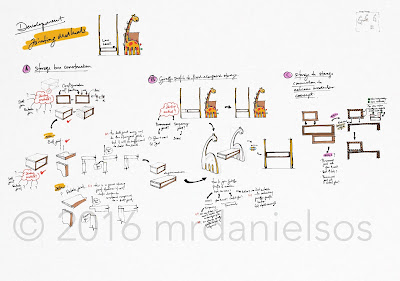
Example: A student might use the concept of a multi-layered, colored-paper storage table designed for children and adapt it into a dining table with similar multi-functional features. This involves identifying the clever aspects of the original design and reimagining them in a new product context.


Step 3: SCAMPER

Overview: SCAMPER stands for Substitute, Combine, Adapt, Modify, Put to another use, Eliminate, and Reverse. This technique encourages thinking about the design from multiple angles, leading to comprehensive and well-rounded ideas.

Rationale:

  • Provides a systematic approach to exploring various aspects of a design.
  • Encourages deeper thinking and exploration of the ideas generated.
  • Ensures that the designs are innovative and well-thought-out.

Action Plan:

  • Use the SCAMPER technique on your enhanced designs:
    • Substitute: What materials or components can be replaced?
    • Combine: Can you combine elements from different designs?
    • Adapt: How can you adapt existing features to better suit your needs?
    • Modify: What can be modified to improve the design?
    • Put to another use: Can any parts be used differently?
    • Eliminate: What can be removed to simplify the design?
    • Reverse: Can any processes be reversed or done differently?

Conclusion

Starting with Shape Borrowing helps students generate initial visual ideas. Concept Borrowing enhances these ideas by integrating useful features, and SCAMPER refines them systematically. This structured approach ensures a comprehensive and innovative ideation process.

By following this simple, logical, and practical guide, teachers can make the decision-making process more effective and enable students to begin quality work immediately. While there may not be a single best way to approach ideation, this guide provides a solid foundation for generating, enhancing, and refining ideas in D&T classes.

Additional Resources:

Feel free to share thoughts and experiences in the comments below! How have you guided students through the ideation process? What techniques have worked best? Let's create a collaborative space to enhance D&T education.

Keep a look out for the "D&T Design Journaling for Students" GPT built to assist students in their Design & Technology (D&T) design and make Design Journal coursework from start to end. 

The Ultimate Design Journaling Guide Design & Technology AI GPT

The Ultimate Design Journaling Guide GPT

If you want to try it, email mrdanielsos@yahoo.com.sg to request for a 1-week trial.

#DesignAndTechnology #DandTEducation #IdeationTechniques #ShapeBorrowing #ConceptBorrowing #SCAMPER #CreativeThinking #InnovationInEducation #StudentProjectIdeas #DesignJournaling #PracticalGuideForTeachers #DTStudents #TeachingInnovation #StudentCreativity #DesignProcess #DesignThinking #ClassroomInnovation #EducationResources #TechniquesForTeachers #ProjectBasedLearning #CreativeEducation #StudentEngagement #DesignIdeation #HandsOnLearning #DesignInspiration #EffectiveTeaching #STEMEducation #DandTProjects #TeacherResources #LearningByDesign #DesignEducation

23 May 2024

Three Levels of Using SCAMPER in Ideation

SCAMPER is a popular technique for ideation and development in design. It provides a structured method for generating creative ideas and solutions. The ability to use SCAMPER effectively varies depending on a student's aptitude, competency, and proficiency in the art of designing, visualizing, and drawing. 

By structuring SCAMPER into three distinct levels, students of varying abilities can engage with this powerful tool, ensuring they have the opportunity to develop their ideation skills progressively.


3-Levels to Use SCAMPER Suitable for Every Design-Ability Level


……………………………………………….

Level 1 (Basic Level):

At Level 1, the student simply uses one SCAMPER acronym at a time independently for each modification of the basic form.

The student will either use one acronym at a time in sequence or choose those that they can manage and ignore the rest. Each acronym used results in an exclusive design, meaning if three acronyms are used, three exclusive designs are produced. 

The outcome of the designs matches the number of acronyms used, providing a straightforward and manageable approach for beginners.

Level 2 (Intermediate Level):

Level 2 represents an intermediate stage where the student has developed the competency and proficiency to merge two or more independent modified ideas into one. 

This process is dependent on the student's capacity and proficiency, as well as their ability and aptitude for design. Typically, when one idea is combined with the basic form, it will automatically require modifications. Basic modifications to the Level 1 forms are necessary to produce a new, integrated design after merging two SCAMPER elements from Level 1. 

This stage begin to challenge students to think more critically and creatively about combining and enhancing their ideas.

Level 3 (Pro Level):

At Level 3, the student has a thorough understanding of SCAMPER and possesses the aptitude and intellectual capacity for advanced design. 

The student can use Levels 1 and 2 at will, applying SCAMPER elements in any order and not necessarily in sequence. Not every acronym needs to be used, which allows for a high level of free play and creativity. At this level, the basic form evolves continuously as SCAMPER elements are added, reflecting the progression and sophistication of the ideation process. 

The Pro Level encourages students to innovate and refine their designs dynamically, utilizing SCAMPER flexibly to achieve complex and well-developed outcomes.

Conclusion

This structured approach to using SCAMPER, from Level 1 to Level 3, provides a clear pathway for both teachers and students in Design & Technology. It ensures that students can gradually build their skills and confidence in ideation, ultimately reaching a level where they can fully exploit the creative potential of the SCAMPER technique.

If you need any help or clarification, do not hesitate to write to me.

#DesignThinking #SCAMPER #Ideation #CreativeProcess #DesignEducation #StudentCreativity #TechnologyInEducation #DesignAndTechnology #InnovationInDesign #TeachingTools #DesignSkills #Prototyping #StudentDevelopment #EducationStrategy #ClassroomInnovation #CreativeLearning


30 March 2023

Mastering Idea Evolution: Developing High-Quality Concepts

Explore the process of idea evolution in design and technology. Learn how to develop and refine your ideas for optimum results. Discover the power of SCAMPER and iterative questioning for creating high-quality concepts. Coming up with ideas can be a daunting task, especially when you have to present multiple ideas. However, it is important to remember that the quality of an idea is more important than the quantity. 

In this blog post, we will delve into the process of idea evolution and how it can lead to the development of high-quality concepts.

  1. When brainstorming, it's crucial to focus on generating a few independent ideas that possess unique features and functions. 
    • Instead of sketching 5 or 10 unrelated ideas, this approach allows you to create a solid foundation for the evolution process. 
    • Keep in mind that the teacher's requirement for multiple ideas can still be fulfilled by developing a few diverse and distinct concepts.
  2. Once you have these independent ideas, it's time to combine their features and functions into an ultimate idea. To accomplish this, you can 
    • utilize the SCAMPER technique. SCAMPER stands for Substitute, Combine, Adapt, Modify, Put to another use, Eliminate, and Rearrange. 
    • By applying these strategies, you can refine and enhance your concepts by exploring alternative possibilities.
  3. However, idea evolution doesn't stop there. It's an iterative approach that involves questioning and continuous improvement. 
    • Carefully consider the functionality, materials, forms, colors, and other aspects that can make your idea better. 
    • Embrace the development process and constantly ask yourself questions to uncover potential improvements and enhancements.
  4. Creating models and conducting tests play a vital role in the evolution process. 
    • By prototyping and evaluating your ideas, you can gather valuable feedback and identify areas that need further refinement. This iterative approach allows for constant improvement and ensures that your idea evolves into its full potential.

The evolution of an idea is essential to ensure that the final product is of the highest quality. By dedicating time and effort to the process, your ultimate idea can transcend its initial form and become a reality. Embrace the journey of idea evolution and unlock the power of developing high-quality concepts.

……………………………………………………..

Let me know in the comments what else you like to learn and watch.

FOLLOW and LIKE on Facebook to get updates as soon as a new post is up: https://www.facebook.com/designjournalsos

Support me, support my work? Buy me a Coffee? https://www.buymeacoffee.com/mrdanielsos

24 March 2023

How to Sketch Faster: Boost Your Ideation Process with These Techniques

Sketching is a fundamental part of the creative process, particularly in the field of design. However, it can often be time-consuming, especially when you need to generate multiple sketches quickly. In this article, we'll explore a simple yet effective technique that can help you sketch up to five times faster, enhancing your ideation process and overall efficiency.


1) Utilize Legends for Recurring Objects


During the sketching process, you might find yourself drawing the same objects over and over again. To save time, consider creating a legend for these objects. A legend is a basic drawing of the object accompanied by a label or name. Instead of redrawing the object each time, you can simply refer to the legend. This method will significantly speed up your work process.


2) Sketch the Object First to Determine Its Proportions


Before diving into the final sketch, make a rough sketch of the object to determine its proportions. This step will help you avoid having to erase and redraw your work, saving you valuable time. For example, a simple bear sketch might take you around 25 seconds, but with this technique, you can reduce that time.


3) Create a Boundary Box to Form a 'Legend'


For your object, create a boundary box to form a legend. You can add some text or alphabets inside the box to indicate what the object is. This process takes only about 5 seconds, and it will help you identify the object quickly when you need it again.


4) Use Symbols Instead of Sketching the Actual Object


Once you have created your legend, use a symbol instead of sketching the actual object when exploring different ideas. By using symbols, you can quickly generate ideas without having to redraw the same object repeatedly.


5) Use Saved Time to Generate More Ideas


The time you save by not having to redraw the same object repeatedly can be used to generate more ideas. This is particularly useful when you're working under a tight deadline and need to produce a lot of sketches in a short amount of time.

In conclusion, sketching is a vital part of the creative process. By using the techniques mentioned above, you can sketch faster without compromising the quality of your work. Remember to create legends for repeated objects, sketch the object first to determine its proportions, draw a boundary box to make a legend, use symbols instead of sketching the actual object, and use the saved time for more ideas. By implementing these techniques, you'll become more productive and efficient in your work.


Let us know in the comments what other topics you'd like to learn about. Don't forget to [follow and like us on Facebook](https://www.facebook.com/designjournalsos) for updates on new posts. If you find our content beneficial and would like to support us, consider [buying us a coffee](https://www.buymeacoffee.com/mrdanielsos).


______________________________________________________

Related Articles:


1) [Mastering Idea Evolution: Developing High-Quality Concepts](https://designjournalsos.blogspot.com/2023/03/evolution-of-idea.html)

2) [Practical Ideation Sketching Tips & Guides](https://designjournalsos.blogspot.com/search/label/Practical%20Ideation%20Sketching%20Tips%20%26%20Guides)

3) [Sketching & Drawing Tips & Guides](https://designjournalsos.blogspot.com/search/label/Sketching%20%26%20Drawing%20Tips%20%26%20Guides)

20 March 2023

Shape Borrowing and Idea Growing: Powerful Techniques in Design Ideation

As a designer, have you ever found yourself stuck in the ideation phase, unsure of how to proceed? Or perhaps you're an individual with a brilliant idea but lack the design skills to bring it to life? In both cases, the techniques of shape borrowing and idea growing can be your saving grace. These powerful design ideation techniques can inspire you to create innovative products that are not only functional but also visually appealing and delightful to use.

What is Shape Borrowing in Design?

Shape borrowing is a potent design technique that involves drawing inspiration from existing shapes and forms to create new and innovative products. But there's more to shape borrowing than just "borrowing" shapes. It's about infusing ordinary objects with new meaning and function, transforming them into extraordinary creations.

The Power of Idea Growing in Design

Idea growing is another crucial element in the design ideation process. It's the concept where an initial idea can activate triggers for alternative ideas or new features. For instance, let's consider the design process of a cat incense holder. The initial idea of using the cat's whiskers to hold the incense might trigger the question of where to store the lighter. This could lead to the innovative idea of 'hiding' the lighter 'in' the cat incense holder's body, thereby enhancing its usability and functionality.

The Role of Play in Design Ideation

During the ideation stage, designers are encouraged to focus on play and free forms. This approach involves withholding criticism and exploring new variations, allowing designers to create a playground for new ideas. They can experiment with different shapes, forms, and functions, leading to the creation of unique and innovative products.

Shape Borrowing and Idea Growing: A Winning Combination

By combining the elements of shape borrowing and idea growing, designers can create innovative products that not only function well but also inspire and delight users. This approach encourages designers to think outside the box, creating products that are visually appealing and delightful to use.

Bringing Your Ideas to Life

If you're an individual with ideas that you'd like to bring to life, but you lack the design skills to sketch or realize your thoughts, don't worry. You can still bring your idea to fruition by seeking help from a design mentor or teacher. With the right support and guidance, you can turn your idea into a tangible product.

We'd love to hear your thoughts on shape borrowing and idea growing. Have you used these techniques in your design process? Let us know in the comments below. And don't forget to follow us on Facebook for more design ideation techniques and tips. If you find our content beneficial, consider supporting us.


25 February 2022

Four Steps to Elaborate an Idea | Two Questions | One List | New Improved Idea(s)

The Ideas Generation phase is probably one of the most challenging phase in the design process. 

Just like if you get the initial design need wrong,  the whole project is practically rubbish. How you start your ideation will determine the quality of the end of Ideation.

A common problem a student have when at the Ideation phase is not knowing what to do next after they draw an idea. Especially when a great deal of effort had been spent thinking, critic, refine (ALL IN THE AIR) and then finally at the end of the dream, a highly detailed drawing becomes the first idea. In that piece of A3 paper; ONE idea is all you got. 

How can you elaborate on an idea once you have drawn the first one? 

Four Steps to Elaborate an Idea using a Note Holder Example


In this video I show you FOUR simple steps you can elaborate an idea beginning with two prompting questions. Use this strategy and never get stuck ever again. You might end up not being able to stop. Because before you were blank, now triggers appear from everywhere for new (improved) versions of the previous one(s).


If you like the video and my contents, please Subscribe, LIKE and Share. 

Let me know in the comments what else you like to learn and watch.

FOLLOW and LIKE on Facebook to get updates as soon as a new post is up: https://www.facebook.com/designjournalsos

Support my work? Buy me a Coffee? https://www.buymeacoffee.com/mrdanielsos

Ideas Generation and Development; How do they look like? Part 1 of 2: IDEATION

I often hear questions and confusions about Ideas Generation and Development. How do I know if I am Ideas Generating and how do I know if I am Developing ideas. How do I do them?

Well as the titles imply, “Ideas Generation” taken literally means you produce lots of ideas. You ‘generate’ them. Many. Think of it as Sketching and Exploring many ideas.

Here you ask lots of questions that will prompt you to think and sketch many possibilities. Different ways to function. Some minor improvements and then next one. Next one. Next one. Next one. Creating lots of wonderful creative alternatives. 

Those that works those that not. Who cares. That’s Ideas Generation.

In this video, I chat about Ideas Generation:


In the next video I will talk about Development. Part 2 of 2 can be found here: https://designjournalsos.blogspot.com/2022/02/ideas-generation-and-development-how-do_25.html

Development” does not sound anything like exploratory any more, does it? When you develop, you refine. Fine-tune. When you work on details, you won’t be in the playful discovery mode like you would in Ideas Generation. You pay more attention to details. And work towards finalisation and a final concept ready for presentation and prototyping.

If you like the video and my contents, please Subscribe, LIKE and Share. 

Let me know in the comments what else you like to learn and watch.

FOLLOW and LIKE on Facebook to get updates as soon as a new post is up: https://www.facebook.com/designjournalsos

Support my work? Buy me a Coffee? https://www.buymeacoffee.com/mrdanielsos

23 February 2022

Idea Generation: How to begin? Shape Borrow? Inspiration? Research? SCAMPER? What Questions?

Practical tips and insights on how to Generate Ideas starting with Shape Borrowing - Just the way how Mr Daniel would do it.

This example is a student’s work and he was clearly stuck. I took his paper and did a photocopy and attempted a re-work. To show you how mrdanielsos would have done it differently. And effectively.

How go go from STUCK’        to              ‘FREE FLOW

Student wants to design and make something that can wipe a table dry instantly. I did not know why he chose a snail toy for a start. Obviously because of this choice, he did not know what to do next. 

I can fully understand because the paper seemed blank. Lacking in clarity. etc. In this video, I will show you from start to finish how I would get out of this predicament of getting stuck with this seemingly impossible starter with a snail toy for a product to dry a table. 

What you’ll see and learn from this video is done LIVE on the spot without pre-preparation or plans. I am approaching this as if I am actually trying to ideate on the spot.

In this video you will learn how to set your ideation page clearly. What you need to state in advance. What you need to know. How to make use of your Design Specifications and Product Research to your advantage. The SCAMPER technique will also be explained and I’ve used ‘Combine’ and ‘Eliminate’ in this video. I also spoke briefly about ergonomics and anthropometric and how they will include the size and form of the design. You will also learn what you can do after you have drawn a solution (or an idea). What to do next? What questions to ask? How to ask questions? etc.

If you like the video and my contents, please Subscribe, LIKE and Share. 

Let me know in the comments what else you like to learn and watch.

FOLLOW and LIKE on Facebook to get updates as soon as a new post is up: https://www.facebook.com/designjournalsos

Support my work? Buy me a Coffee? https://www.buymeacoffee.com/mrdanielsos

15 February 2022

Improve my SKETCH!

One of the most common problems students have: Coming up with a decent sketch of anything. 

Does that sound like you?

Have difficulty working out proportions and perspectives?

Always cannot get your sketches or drawings right?

See what can be done to SUPERCHARGE your drawing(s)


If you like the video and my contents, please Subscribe, LIKE and Share. 

Let me know in the comments what else you like to learn and watch.

FOLLOW and LIKE on Facebook to get updates as soon as a new post is up: https://www.facebook.com/designjournalsos

Support my work? Buy me a Coffee? https://www.buymeacoffee.com/mrdanielsos


Three Ways to effectively Copy an Image - the D&T way and the Art way

THREE SUPERCHARGE ways to copy an image for SHAPE BORROWING

Some general comments on each of them and how useful they are for various applications like for copying and for creating new sketches. Some are best for D&T and some are for ART. But all of them are interchangeable to be best of your advantage if you know how to do everyone of them well.

1. the Geometric Shape Method (GSM) 
3. the Negative Space Method (NSM)  1. The gsm is most versatile for dt. 2. The gm is not so good for new sketches, otherwise the second most versatile for dt. 3. The negative space is one of the quickest way to copy. But not for creating new sketches. Best for copying artistic organic references, not entirely useful for dt application.

Examples of Shape Borrowing using the Geometric Shape Method:

Example of using Negative Space:


A video of the process on how the Negative Space method can be used for copy an image.


If you like the video and my contents, please Subscribe, LIKE and Share. 

Let me know in the comments what else you like to learn and watch.

FOLLOW and LIKE on Facebook to get updates as soon as a new post is up: https://www.facebook.com/designjournalsos

Support my work? Buy me a Coffee? https://www.buymeacoffee.com/mrdanielsos


17 July 2018

How to Choose the Best Image for Shape Borrowing?

Fig. 1

Shape borrowing is probably one of the most common starter exercise for Ideas Generation. References could be obtained easily to be shape-borrowed but not all images are made equal, i.e.  to be suitable for shape borrowing. There are useful and not so useful images, although technically you could shape borrow just about anything you want. 

Following are some points to help you shape borrow more effectively:
  1. When you search for reference images, include 'silhouette' in your search. A silhouette excludes all other details (e.g. eyes, nose, whiskers, etc.) that helps suggest a particular animal. If you can identify the animal just looking at its silhouette, that is one good reference.
  2. If you chose a photo or an image of an animal (or whatever you have chosen), eliminate all internal details when you shape borrow. Look at the middle portion of Fig. 1, one of the puppy I shape borrowed originally had spots on its body. But when I shape borrowed it, the spots and facial features are not included.
  3. When you finally finished a series of shape borrowed drawings (look at the bottom portion of Fig. 1), ask yourself this question, "Can I still recognise the animal just by looking at its outline?". If the answer is a definite "Yes.", you have a good shape borrowed drawing. Shape Borrow drawings #1 and #3 seem to still retain the shape of a dog quite reasonably. Shape Borrow drawing #1 is the best one. When I look at Shape Borrow drawing #2 I find it difficult to guess what that shape resembles. 
Use the points above in future when you are considering Shape Borrowing. That may save you time drawing using useless references in the first place that does not produce a good outcome. The time gained could be used more effectively for development later on.

Let me know if this helps!


12 July 2016

Pictorial Idea Generation and Development (Using SCAMPER)

Updated on 2nd August 2016

This post is an extension and a supplement to "Coursework Experiential Journal Component 2016 Example" that was originally created as a guide and reference material for my Secondary 3NA student mini coursework. I will not repeat information I have already posted previously.

What you'll see in this post are pictorial/visual examples on Ideas Generation and Development (and refinements) in a design journal. The examples do not represent any complete section of a journal. They serve as a starting point - an example - a demonstration - a suggestion - a recommendation - etc. to show what sort of contents may go into, say development, and how you can present your research and information in the journal. 

Use them as a reference and a guide to start or to improve your journal. Make informed choices on your own on what your takeaways should be after looking at the materials in here. Do not copy. 

If you find this helpful, I would love to hear from you. If you have suggestions, please do not hesitate to link up with me.

----------------------------------------------------------------------------------------------------
Idea Generation / Ideation

Use of photos and images are starter and triggers for more ideas. In this case images of animals. Design Brief is about a storage solution that will appeal to children, that will motivate them to keep their toys.


----------------------------------------------------------------------------------------------------
Development / Refinement (Using SCAMPER)

Refining Shape & Form of a selected idea / concept. Some suggested ways that may help you start the process. Interestingly I use S.C.A.M.P.E.R. for this. Now you know S.C.A.M.P.E.R. need not be used only for ideation, but a great tool for development too.


---------------------------------------------------------------------------------------------------
Development / Refinement

Refining Jointing Methods on the various parts of the selected idea / concept. Some suggested ways that may help you start the process.


A quick summary on the decisions made for refinement of shapes & forms is quickly drawn at the top of the page. Three areas are then identified that require decision on the most suitable type of jointing methods. 


The page above shows examples on how options for different types of joints can be presented in the journal.


It's always a good practice to summarise all of your decisions every sections. (Above) To have a clearer overview of what I have done so far about jointing methods for the whole product, I consolidate decisions about the types of jointing methods selected for the various parts and draw them as a complete product..

---------------------------------------------------------------------------------------------------
Development / Refinement

Refining Overall Size and Proportions based on Anthropometric Data and Critical Dimensions. 


 To develop the storage size and dimensions , the product height, overall size and other detailed sizing of the other parts of the product, I identified and made a list on the areas that I need to decide on. Then proceed to work out each of one of them using researched Anthropometric data as well as Critical dimensions.

---------------------------------------------------------------------------------------------------
Development / Refinement

Stay tuned for : materials, etc...

---------------------------------------------------------------------------------------------------